Backend Design Service
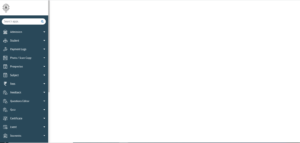
This service is use to handle the admin panel UI Design layout like sidebar Navigation Menu and it gives you middle space, in middle space whatever you want to do you can.
Like this below image

Step 1
Goto Awesome Core > Services module and add the following code if not present.
|
1 |
[services.add backend_design service_label='Backend Design Service' post_type='backend_service' desc='Backend Design Service' /] |
Step 2
Now download backend_design.xml from this url ( URL:https://github.com/WPoets/awesome-apps/tree/main/services/backend_design) and once downloaded the file.
Just go WordPress importer, Tools > Import
![]()
Step 3
Create your APP – e.g. Setting app
Setting app> Go to config > create a module layout
Title: layout (slug: use “layout” only)
Put below code into layout module
|
1 |
[backend_design.layout /] |
Note: This is to provide you a layout as we mentioned above. You can also pass it “menu” as shown in the example below to show menu items specific to the App.
|
1 2 3 4 5 6 7 8 9 10 11 |
[template.set_array navigation] [plot link='#' chckbox="yes" title='Plot' class="plot" icon=''] [child-nav] [user-stories link='{url.site}plot/user-stories' title='User Stories' class='plot' target='' /] [tasks link='{url.site}plot/tasks' title='Tasks' class='plot' target='_blank' /] [notes link='{url.site}plot/notes' title='Notes' class='plot' target='_blank' /] [dashboard link='{url.site}bashboard' title='Dashboard' class='plot' target='_blank' /] [/child-nav] [/plot] [/template.set_array] [backend_design.layout menu='{template.navigation}'/] |
Step 4
For sidebar layout, we need to set an array of a menu list and sub-menu list, which is defined in the ‘backend-menu‘ module of Awesome Core.
Awesome Core> Backend-menu
|
1 2 3 4 5 6 7 8 9 10 11 12 13 14 15 16 17 18 19 |
[templates.add main] [template.set_array navigation] [samples link='#' chckbox="yes" title='Samples' class="samples" icon='{url.site}wp-content/uploads/2020/05/photocopy-scan.png'] [child-nav] [moods link='{url.site}samples/moodboard' title='Moodboard' class='samples' target='' /] [echarts link='{url.site}samples/echarts' title='ECharts' class='samples' target='_blank' /] [/child-nav] [/samples] [error-log link='{url.site}error-log' chckbox="yes" title='Error Logs' class='error-log' icon='{url.site}wp-content/uploads/2020/05/Prospectus.png' /] [setting link='#' chckbox="yes" title='Settings' class="settings" target='' icon='{url.site}wp-content/uploads/2020/05/settings.png' ] [child-nav] [settings link='{url.site}settings/' title='All App Settings' class='settings' target='' /] [plot link='{url.site}settings/plot' title='Plot' class='settings' target='' /] [samples link='{url.site}settings/samples' title='Samples' class='settings' target='_blank' /] [/child-nav] [/setting] [/template.set_array] [template.return template.navigation /] [/templates.add] |
Step 5
You can change the dashboard logo by setting the logo URL in the ‘backend-logo‘ key in the Awesome Core -> settings.
Important things:
- You have to make sure the class name should be app slug (created app slug), and create an array in the same manner as given.
- You can modify the menu name whatever you want.
- If you set “target =_blank” it will open the link in a new tab.
- The “link” attribute has to be an absolute URL.